Prepare SVGs for Animation (The Step You Shouldn't Skip)
Prepare SVGs right, and animation becomes effortless. It’s very important to analyse and prepare SVG files before animating or adding them to the website.
With files clean, well-named, grouped, and optimized, you’ll find that CSS, GSAP, and scroll-driven animations become super easy.
I’ve got a straightforward checklist with some handy tips for getting SVGs ready to animate. You can use this to sort out SVG animation problems too. This is a long list based on my experience.
Note: All the videos/images are from the Figma design tool.
1. Name SVG Layers (Properly!) in design tool
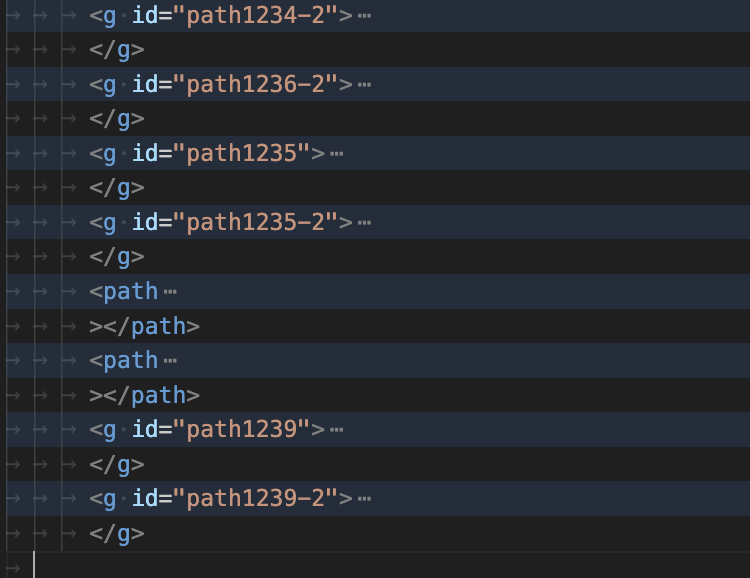
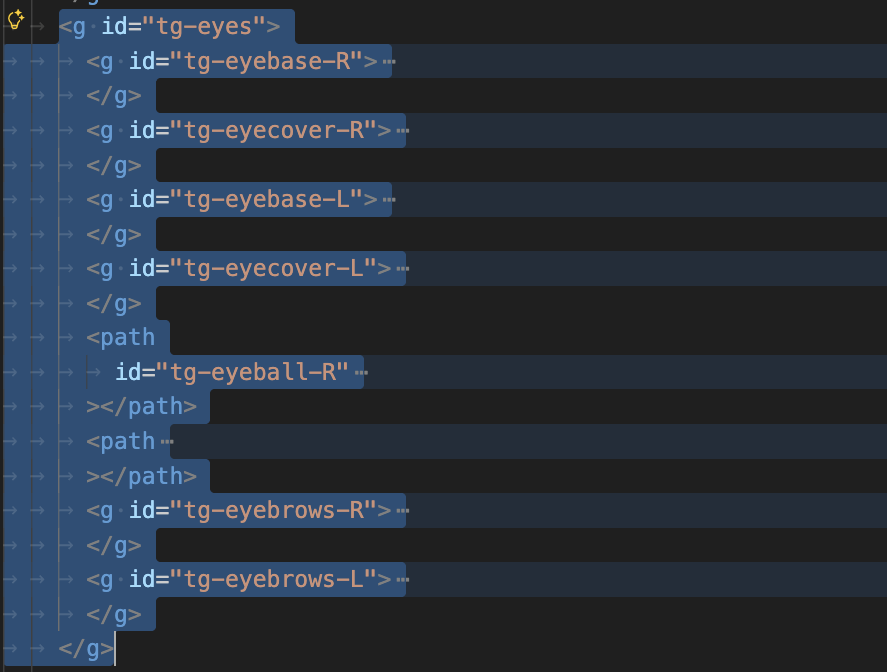
If SVG is full of names like “Group 23,” “Path 98,” or “Compound Shape 2,” that needs to change, because we’ll need to target these elements for animation. Using such generic names can quickly create confusion and make the code messy. When elements have clear names like “star” or “hands,” it becomes much easier to understand what is being animated.
Use clear naming: eye-left, arm-right, star-glow, mouth-smile
SVGs exported from tools love generating this nonsense:
id="path-13284" or id="group34789"
Rename them to:
id="hand-wave", id="eye-blink", id="star-inner"
Prefer IDs for animation targets
IDs are unique. Using ‘#eye-right’ means you’re targeting just that one element for animation, so you won’t accidentally hit others like you might with classes. Browsers also pick out IDs so fast, it helps animations keep chugging along nicely when they have a lot going on.
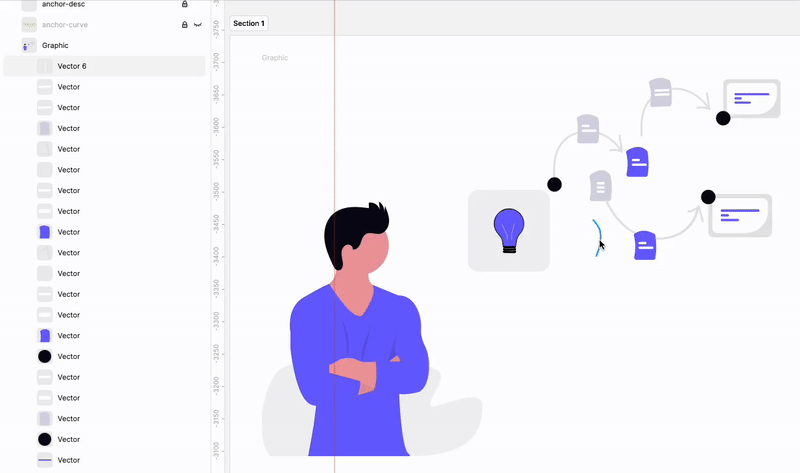
2. Group related elements
Anything that moves together → group it.
- Both eyes? Group them together.
- all the fingers group them to → palm
- palm and arm group them to → hand
DOM becomes clean, and reading and identifying elements in SVG becomes easy. Below is an example where the left side is messy, and the right side shows effective cleaning, grouping, and naming. Always group and name your elements in the design tool before exporting.
3. Simplify Path
Messy paths mean bigger files. Do all the below points before exporting SVG for paths.
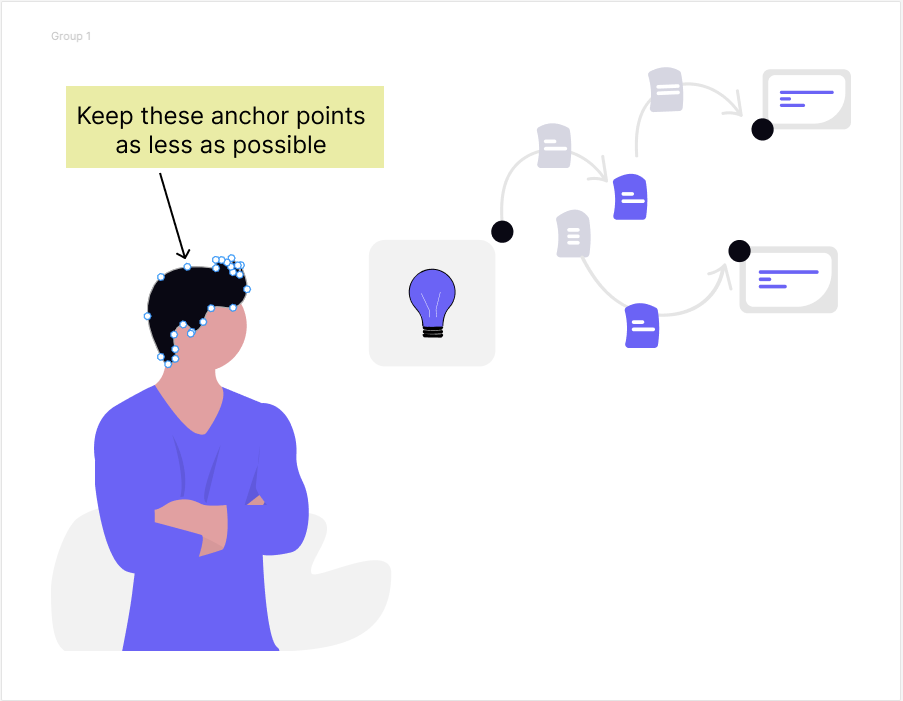
3.1 Delete unnecessary anchor points
Anchor points are the points that define and draw every shape in an SVG.
The more anchor points a shape has, the:
- Larger the SVG file size
- Messier the SVG structure
- Harder it becomes to animate or edit later
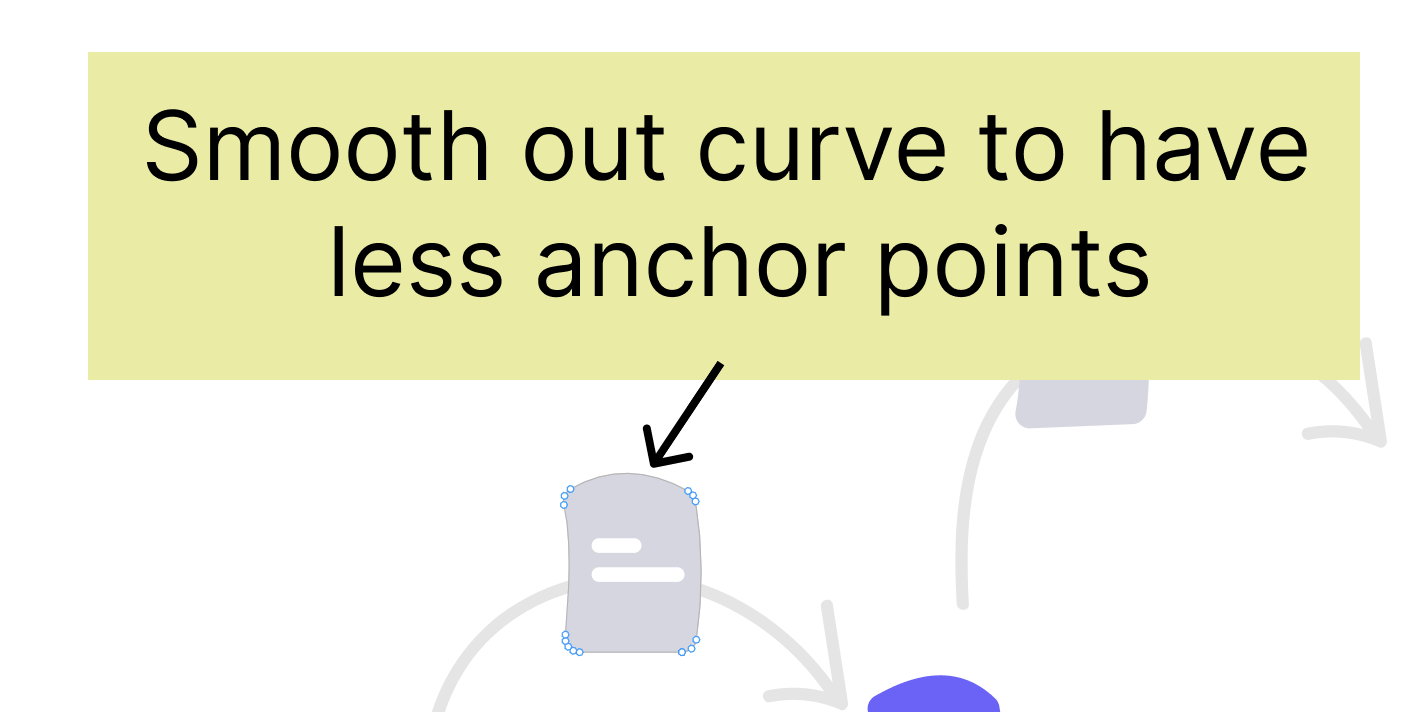
That’s why, while drawing your SVG, it’s a good practice to use as few anchor points as possible.
3.2 Use Built-In Tools (But Be Careful)
Most design tools provide settings or commands to reduce anchor points.
While this can be helpful, it’s important to double-check the result:
- Sometimes the tool does a great job
- Other times, it can distort or change the shape
Always double-check your SVG after reducing anchor points to ensure it still looks right. Example below image of a person’s hair.
3.3 Smooth corners if needed
This relates to the previous point, but I want to mention it.
Curves and corners require more anchor points than straight lines in order to look smooth.
3.4 Path vs Shape
The graphic below displays two circles; they seem identical.
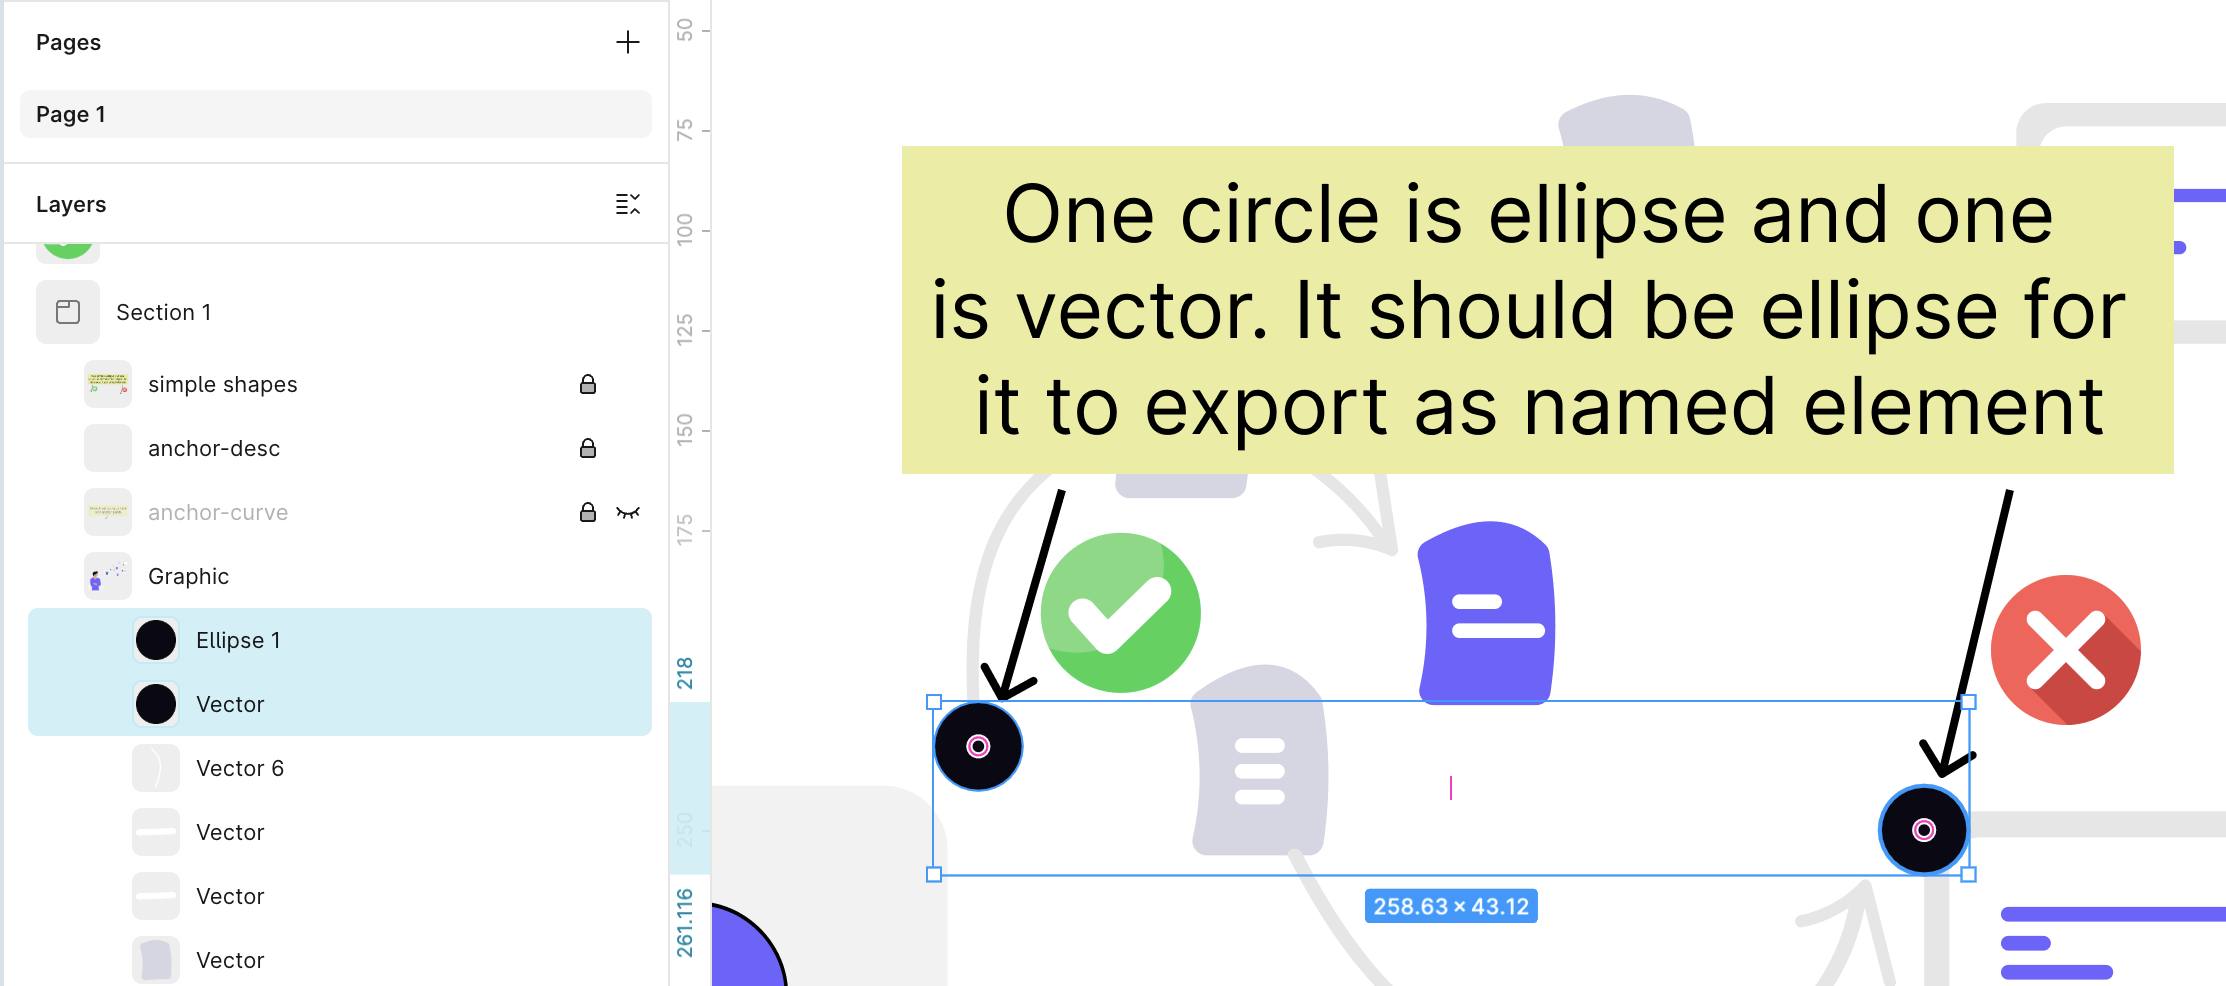
However, they’re created in two different ways. If you check the left sidebar (Layers panel), you’ll notice:
- One circle is an Ellipse — this is a shape
- The other one is a Vector; it’s a path.
Though they resemble circles, their inner workings are dissimilar. When you export this graphic as an SVG:
- The ellipse shape gets exported as a
<circle>element - The vector gets exported as a
<path>element
Why You Should Care
For SVG animations, it’s always better to keep simple shapes as actual shapes: Circles as <circle>, Rectangles as <rect>, Lines as <line>
These elements are:
- Cleaner
- Easier to read
- Easier to animate with CSS or GSAP
- Make the SVG size smaller, which helps in performance
Converting a shape into a path results in a loss of simplicity, which complicates SVG management as file size increases. And when your whole SVG is huge with tons of paths, it really makes a difference.
4. Line animation — Stroke vs Fill (very important)
If you plan to animate lines, make sure SVG is using strokes, not filled shapes. A filled shape might look like a line, but single drawn line animations are stroke-based animations. They rely on stroke-dasharray and stroke-dashoffset.
So always check:
- Is this a stroke?
- Or is it a filled path pretending to be a line?
In the graphic below, you’ll see two lines.
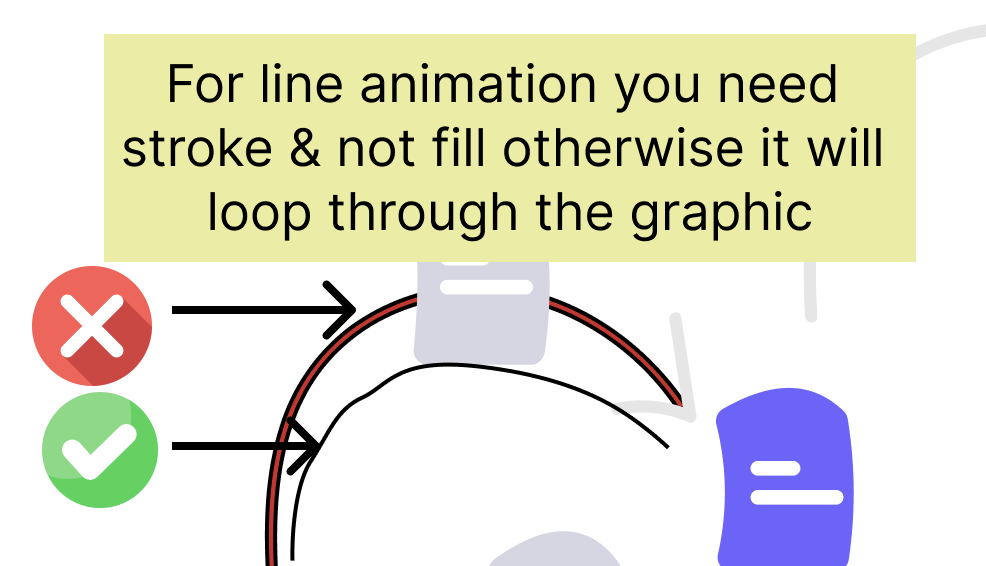
The first line has a red fill with a stroke applied to it. I intentionally added the stroke here to increase the shape’s visibility and simplify its understanding. Imagine the fill and stroke are the same color, then it becomes difficult to tell that a fill exists for the shape. In such cases, when you try to animate it, the animation may not behave as expected; it will move in thin strips.
For the second line, we just used a stroke, no fill.
5. Reset or Flatten Transforms
Design tools like Illustrator often add hidden transformations like rotation, scale, X and Y transforms. When exported, these transforms can break the animation.
When you draw any shapes and then rotate in a design tool, usually a transform (rotate/scale/translate) gets added instead of actually changing the coordinates.
When we animate using GSAP or CSS, the animation starts from the element’s original coordinate values. Instead of modifying the actual path coordinates, Adobe Illustrator and similar tools often position elements using a ‘transform’ attribute.
Because of this, the browser still uses the element’s original position as the base and applies the transform separately. When GSAP or CSS animations run, they animate relative to the original coordinates and do not account for Illustrator’s transform in the way we expect.
In the image below , the highlighted transform is unnecessary. This group contains the entire graphic; just remove it in the design tool or delete it from the code and adjust.

With and Without Transforms: SVG Animation Comparison
The CodePen below shows the difference between animating an SVG with and without transforms.
The examples use CSS and GSAP separately, making it easier to see how each approach handles SVG transforms. This comparison highlights how transforms affect SVG animations and why unmanaged transforms can lead to unexpected results during animation.
See the Pen SVG prep YT: Transform by trapti (@tripti1410) on CodePen.
6. Remove Hidden Shapes
The GIF below illustrates this. While the element is not visible, it exists, and it will be exported along with the SVG. We need to look for such elements. Sometimes by mistake these get created, and we should clean them up. Either scan in the design tool or after exporting the SVG, but do it as this increases the size of the SVG.
7. Styles
7.1 Inline styles vs. attributes vs. internal CSS (<style> tag)
You can include styles in three ways when exporting an SVG.
- As inline styles
<Path d='M12.....' style="fill: #000; stroke: #fff; stroke-width: 2" />- Or as SVG attributes
<Path d='M12.....' fill="#000" stroke="#fff" stroke-width="2" />- Or style tag on top of the SVG
<svg width='100px' height='100px' viewBox='0 0 100 100'>
<style type="text/css">
  .std-0 {
    fill="#000";
    stroke="#fff";
    stroke-width="2"
  }
<style>
<path class='std-0' d='12.....' />
</svg>
Keep presentation attributes
<Path d='M12.....' fill="#000" stroke="#fff" stroke-width="2" />Attributes, particularly for animation, provide a cleaner and more predictable method for controlling SVG properties such as fill, stroke, and opacity.
Keep in mind that animation libraries such as GSAP or CSS animations apply styles dynamically, which means additional CSS can sometimes override or conflict with your animations in unexpected ways.
A good practice is to keep presentation attributes directly on the SVG elements as a base. This ensures proper rendering, improves accessibility (for example, in reader modes), and gives you a reliable fallback. If needed, you can still override these attributes with CSS, but starting with attributes keeps your animations simpler and more robust.
See the Pen SVG- width attribute by trapti (@tripti1410) on CodePen.
7.2 Check for inherited styles
SVG styles can inherit from parent groups. So even if an element does not have any attributes, it is getting either a default or from a parent’ <g>. When animating, this can get confusing, especially if your animation doesn’t behave the way you expect.
Keep styles predictable
The goal of SVG prep is predictability.
When you animate, you want:
- No surprises
- No inherited magic
- No conflicting styles
Clean styles mean your animations behave exactly how you expect.
8. Use clipPaths & masks intentionally
clipPath are powerful, but they:
- increase complexity
- sometimes break morph animations
- can affect performance
Use them only when needed and keep them simple.Point 10 includes a CodePen example that uses clipPath.
9. Always Export with a viewBox
A proper viewBox allows SVG to scale responsively without breaking the layout.
Example: viewBox="0 0 500 500"
Without it? SVG is basically a stubborn PNG.
Here in the below CodePen showcases SVG with a viewBox and SVG without a viewBox. If you try to make this screen shorter, the SVG without a viewbox will not adjust to the size of the container and will look broken.
See the Pen SVG prep with/without viewbox by trapti (@tripti1410) on CodePen.
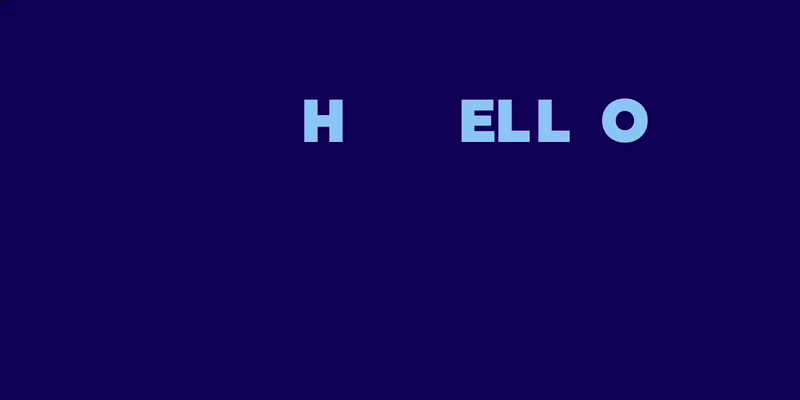
10. Decide early about text
Text behaves differently in SVG:
If you want letter animation like below → keep text as text
If you want line animations or any kind of handwriting animation → convert to outlines
Note: This makes the file size bigger. Also, it’s not text-accessible, so we need to add ARIA labels and descriptions to make it work for everyone.
Here are some examples where the texts are outline.
- This Pen by Cassie used text in a very diff way. She has used clip paths in SVG to create such a look.
See the Pen Cassie! by Cassie Evans (@cassie-codes) on CodePen.
- This handwriting animation I created where I transformed text to outline strokes.
See the Pen tripti text handwriting animation: CSS by trapti (@tripti1410) on CodePen.
Just decide early so you don’t redo work later.
11. Final Cleanup: Optimize with SVGOMG
Before you animate, run your SVG through SVGOMG. This is a powerful tool for optimising SVG files, and even if you skip every other step, this one is worth doing.
SVGOMG helps:
- Clean up unnecessary data
- Reduce the overall file size
- Make the SVG easier to work with during animation
Some common optimisations include:
- Removing metadata
- Cleaning unused or redundant attributes
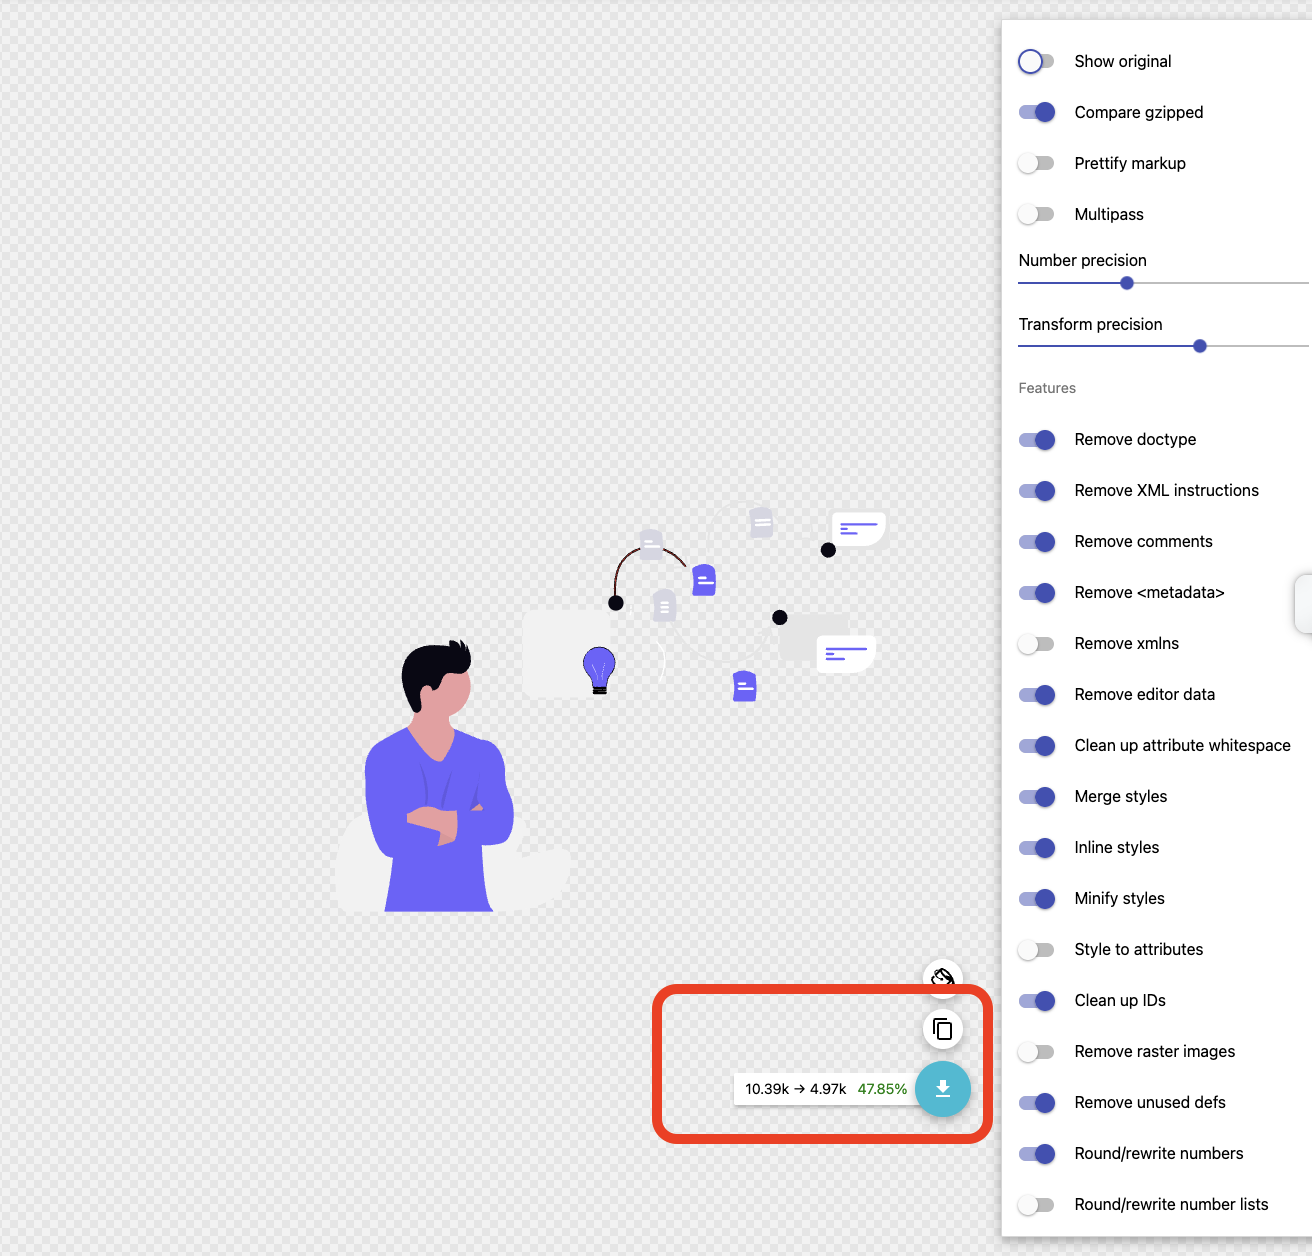
SVGOMG offers many toggle options. Take a moment to review them and enable or disable settings based on what you want to keep or remove. The image below shows the red rectangle highlighting how much the SVG size decreased before and after SVGOMG changes.
Important Workflow Tip
This should be the last step before your SVG becomes animation-ready. Make sure all design changes are final before running the SVG through SVGOMG. While animating a cleaned SVG, if there are issues, going back to the design tool, making edits, and re-exporting becomes a long and messy process.
Conclusion
Clean first. Animate after.
Consider what needs to be seen and when in animation. Map out your animation steps first. You’ll get a clear picture of how to do the animation and what’s required. Checks inside the design tool:
- Add all the elements in the design.
- Name the layers.
- Groups the relevant elements.
- Scan the left sidebar to find anything unnecessary. If exist then remove it.
- Check for smoothing the anchor points if you can.
- Export with presentation attribute.
Once exported from the design tool:
- Check for viewBox, width, and height of the SVG.
- Pop open the SVG in your browser and see if it’s displaying correctly and is responsive.
- Look for unnecessary transformations in the browser debugger. Try removing and see if it makes any difference. If not, then remove it.
- Check the size of the SVG. If it is huge, put it in SVGOMG and see how much that can reduce it? If not, go back to the design tool and see what can be done. Here is a very good article on it. https://css-tricks.com/understanding-and-manually-improving-svg-optimization/